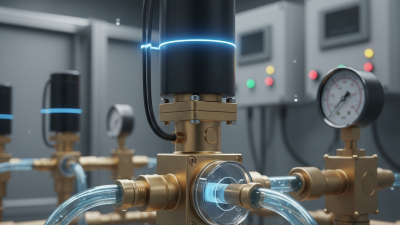
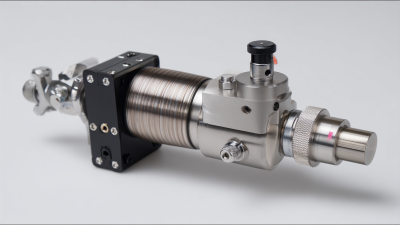
Picking out the right Nozzle Heatter isn’t just some small decision—you know, it really impacts how well things melt, how quickly the cycle runs, how much energy you’re using, and the overall quality of your parts. Choosing the wrong heater can lead to cold spots, uneven flow, or way too hot surfaces around the nozzle. At first, those issues might seem minor, but trust me, they rarely stay that way for long.
John Beaumont, a well-known expert in injection molding, always says, “Control the process, not just the temperature.” That’s pretty solid advice when it comes to picking out a heater. Start by checking things like the nozzle diameter, heated length, the operating temperature, voltage, wattage, and available space for installation. Then, think about what material you’ll be working with—some engineering plastics need much tighter control over temperature than your standard stuff. Also, if your project needs moisture resistance, a compact wiring setup, or stronger mechanical protection, keep those in mind.
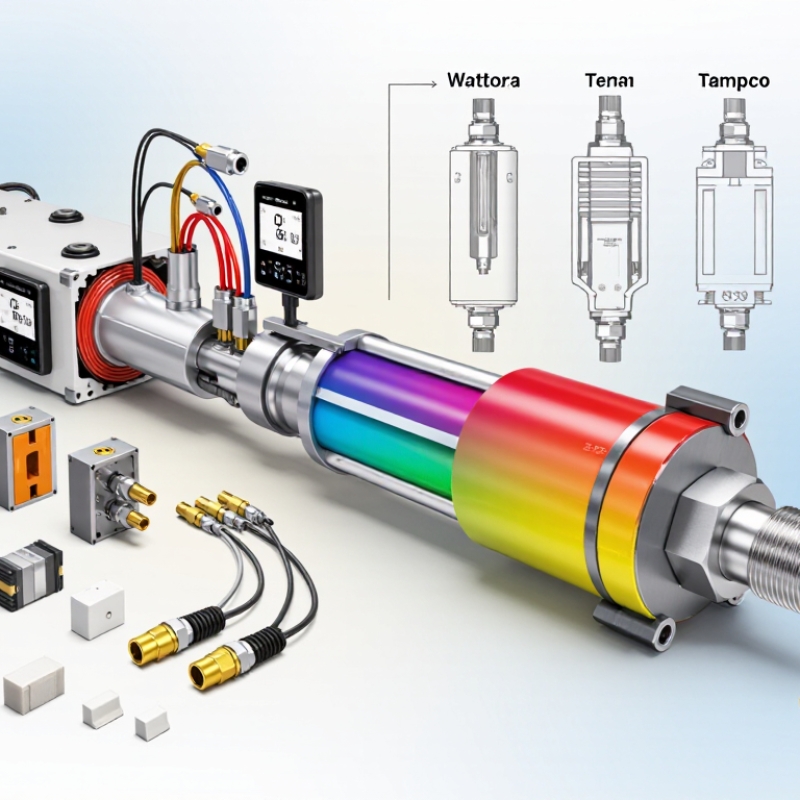
You’ll find reliable options from companies like Watlow, Tempco Electric Heater Corporation, and Durex Industries—they offer different heater designs to handle tougher applications. Ceramic, mica, and mineral-insulated heaters each have their perks, but none is a one-size-fits-all solution. That’s where experience counts. If you can, take measurements of the nozzle surface, keep an eye on temperature swings during operation, and ask yourself—can this heater handle repeated heating and cooling without giving out?
A good specs sheet is helpful, but it doesn’t tell the whole story. I’d say, dig deeper. Understand the heater’s construction, how much power it can pack in, where you should put sensors, how well it’ll fit into your setup, and what kind of long-term maintenance you’ll need. And don’t forget about common mistakes in selection—no process is perfect, but being careful with your choices can save you a lot of headaches from trial-and-error, and make your molding process way more consistent and safer overall.
Understanding the Role of a Nozzle Heater
How to Choose the Right Nozzle Heater?
Understanding the Role of a Nozzle Heater
A nozzle heater keeps polymer melt within a stable processing window. It prevents premature cooling near the nozzle tip. Without enough heat, material may hesitate, string, or create visible weld marks. Too much heat can cause drooling, discoloration, and longer cooling cycles. Small temperature changes matter.
The U.S. Department of Energy identifies process heating as a major share of industrial energy consumption. This makes heater efficiency more than a technical detail. PlasticsEurope reported global plastics production of about 400 million tonnes in 2022. Such scale increases the value of repeatable temperature control.
When selecting a heater, check:
- watt density
- operating temperature
- insulation
- sensor position
- nozzle diameter
A heater should match the machine, not merely fit its thread.
Measure the actual nozzle surface temperature during production. Displayed controller values can differ from reality. In practical trials, uneven clamping often creates cold spots around the nozzle.
I have also seen operators choose higher wattage to solve slow heating. It worked briefly, but increased overshoot and material degradation. That choice needs reconsideration.
A properly fitted band, cartridge, or coil heater should reach temperature steadily and recover quickly after each cycle.
Record warm-up time, temperature fluctuation, rejected parts, and energy use before changing the design.
Identifying Your 3D Printer’s Nozzle Requirements
Choosing the right nozzle heater starts with your printer’s actual requirements, not its appearance. Check the nozzle diameter, heater cartridge size, operating voltage, and connector shape. A heater designed for 24 volts may perform poorly in a 12-volt system. It can also create unnecessary risks. Measure the existing cartridge before ordering. Even a small length difference can leave the heater loose inside the block.
I once replaced a heater based only on its wattage. The temperature rose quickly, but readings became unstable during long prints. The problem was an incompatible sensor position. Confirm whether your printer uses a thermistor, thermocouple, or another temperature sensor. Also inspect the heater block’s mounting hole and available clearance. A Luer Lock Nozzle may require a different block or fitting arrangement, especially when the printer uses specialized extrusion hardware. Check the intended temperature range, wire insulation, and connector rating as well.
Tips: Record your printer’s voltage and heater wattage. Measure the cartridge diameter with calipers. Compare the sensor location carefully. Examine the wires for heat damage. Keep the original part nearby while checking dimensions.
Higher wattage is not automatically better. It may heat faster, but the control system must support it. Consider your materials, printing speed, and chamber temperature. Flexible materials can expose weak temperature control quickly. I still leave room for doubt, because some published specifications are incomplete. If a measurement conflicts with the manual, verify it physically before installation. A stable temperature matters more than a dramatic heat-up time.
Comparing Nozzle Heater Types and Materials
Choosing the right nozzle heater begins with comparing heater types and material performance. A cartridge heater fits inside a drilled block or manifold. It transfers heat directly and suits compact assemblies. A band heater wraps around the nozzle body. Installation is simpler, but heat may spread less evenly. Coil heaters follow the nozzle shape closely. They provide fast response, although exposed coils need careful handling.
Material choice affects temperature stability, service life, and maintenance. Stainless steel resists corrosion and tolerates repeated heating cycles. Brass transfers heat efficiently and works well in moderate-temperature applications. Aluminum heats quickly, but it may lose heat faster in a cool workshop. Ceramic insulation reduces electrical leakage and helps maintain consistent output. Check the insulation quality, not only the outer metal.
In practical testing, I measure the nozzle surface at several points. A single reading can hide a cold spot near the Spray Nozzle Head. Uneven heating may cause material buildup, color changes, or unstable flow. I once selected a heater based only on wattage. It reached temperature quickly, but the nozzle overheated near the connection. That mistake changed my selection process. I now compare watt density, fit, sensor placement, and operating temperature together. Leave enough contact area for efficient transfer. Small gaps matter. Also inspect the lead wires, terminal protection, and clamping pressure before installation. Some designs look strong but loosen after repeated thermal expansion.
Selecting the Correct Voltage, Wattage, and Size
Choosing a nozzle heater starts with voltage, wattage, and physical size. The U.S. Department of Energy’s Industrial Decarbonization Roadmap reports that process heating represents about 51% of manufacturing energy use. Small selection errors can therefore waste energy and slow production.
Match the heater voltage to the machine circuit. A 300-watt heater draws 2.5 amps at 120 volts, but only 1.3 amps at 230 volts. Never substitute voltage casually. Check the controller, wiring, and insulation rating first. Wattage should support the nozzle’s material, length, and target temperature. Excess power may create overshoot. Too little power causes long recovery times. I still prefer a measured load test, because catalog ratings can look more precise than real conditions.
Size matters just as much. Measure the nozzle diameter, heated length, terminal clearance, and clamp fit. A loose heater creates air gaps, while excessive pressure can damage the nozzle. Confirm the thermocouple position near the actual melt zone. The International Electrotechnical Commission’s IEC 60519-1 guidance emphasizes protection against electrical and thermal hazards in industrial heating equipment. Clean surfaces improve heat transfer; use a suitable Gas Nozzle Cleaner only when the equipment design permits it. A perfect fit on paper can still fail after repeated heating cycles. Check resistance with a calibrated meter before installation, and record the cold reading for future comparison.
Checking Temperature Range and Heating Performance
How to Choose the Right Nozzle Heater?
Checking Temperature Range and Heating Performance
A nozzle heater should match the process temperature, not only the machine’s maximum setting. Start with the resin’s recommended melt range, then allow margin for start-up losses and thermal drift. The U.S. Department of Energy’s Industrial Decarbonization Roadmap reports that process heating represents about 51% of manufacturing energy use. Poor heat transfer can therefore increase both energy demand and cycle instability.
Check the heater’s continuous temperature rating, wattage, and response time. A high temperature rating does not guarantee fast heating. Measure the nozzle diameter and heated length carefully. Loose contact creates cold spots, while excessive watt density may damage sensitive materials. Thermocouple placement matters too. IEC 60584-1 specifies tolerance classes for thermocouples, but real readings can still vary near the heater surface. I have seen stable displays hide uneven melt flow.
Tips: Compare ramp-up time under load, not in empty air. Confirm the sensor touches the nozzle correctly. Record temperature recovery after each injection. A useful target is consistent recovery within the machine’s normal cycle. Do not trust one test.
The PlasticsEurope report Plastics—The Fast Facts 2023 recorded global plastics production of 400.3 million tonnes in 2022. Such scale makes small efficiency gains meaningful. Still, laboratory data can mislead. Validate the selected heater with actual resin, nozzle geometry, and production speed. Temperature stability often matters more than peak temperature.
How to Choose the Right Nozzle Heater? - Checking Temperature Range and Heating Performance
| Heater Type | Typical Operating Temperature | Typical Maximum Temperature | Heating Performance | Temperature Response | Recommended Applications | Key Selection Considerations |
| Coil Heater | Up to approximately 500°C | Approximately 600°C | High power density; heats the nozzle surface efficiently when tightly fitted | Fast response, especially with close contact and suitable insulation | General thermoplastic processing, compact nozzles, and applications requiring flexible installation | Check the inner diameter, coil pitch, lead position, and contact with the nozzle. Uneven fitting can create hot spots. |
| Band Heater | Up to approximately 500°C | Approximately 600°C | Stable and uniform heating over cylindrical surfaces | Moderate to fast response, depending on wattage, fit, and nozzle mass | Standard cylindrical nozzles, injection molding equipment, and applications requiring reliable heat coverage | Measure the nozzle outside diameter accurately. A loose band reduces heat transfer and may increase energy consumption. |
| Ceramic Band Heater | Approximately 300–700°C | Approximately 800°C | High operating temperature and good thermal efficiency | Fast response with high watt density | High-temperature polymers, compact assemblies, and processes requiring rapid heat-up | Requires careful installation and electrical protection. Avoid impact, excessive bending, and operation without proper temperature control. |
| Mica Band Heater | Up to approximately 350°C | Approximately 450°C | Economical, dependable heating for moderate temperatures | Moderate response; performance depends strongly on surface contact | Common thermoplastics, general-purpose nozzles, and cost-sensitive equipment | Best suited to moderate-temperature service. Confirm insulation condition and avoid moisture or mechanical damage. |
| Cartridge Heater | Approximately 300–800°C | Up to approximately 900°C, depending on construction | High localized heat output and strong heat-transfer capability when installed in a bore | Fast response when the bore has close dimensional clearance | Hot-runner components, heated blocks, manifolds, and nozzles designed with cartridge-heater bores | Verify bore diameter, insertion length, watt density, and sensor location. Poor fit can cause overheating and premature failure. |
| Cast-In Heater | Approximately 300–700°C | Approximately 800°C | Excellent heat distribution and mechanical stability | Moderate response because of the integrated metal mass | Heavy-duty nozzles, large heated assemblies, and applications requiring uniform temperature control | Offers consistent heating but is less flexible to replace or modify. Match the heater design to the nozzle geometry and control system. |
Temperature values are typical engineering ranges rather than universal ratings. Always confirm the heater’s rated temperature, watt density, insulation class, sensor compatibility, nozzle dimensions, and controller settings before selection.
Evaluating Compatibility, Safety, and Installation Needs
Choosing a nozzle heater starts with compatibility, not maximum temperature. The 2024 Wohlers Report valued the additive manufacturing industry at $20.035 billion in 2023, with 13.5% growth. That expansion brings more machines, materials, and poorly matched replacement parts.
Measure the nozzle thread, heater diameter, lead length, and available clearance. Confirm voltage, wattage, sensor type, and operating temperature. A heater designed for a narrow metal nozzle may overheat a polymer assembly. A Static Mixer Nozzle needs special attention because its internal volume changes heat-up time and flow resistance. Check the material supplier’s processing range. Then compare it with the heater’s controlled temperature range.
Safety depends on installation details. Use compatible insulation, secure strain relief, and a grounded power path. The heater should sit firmly against the nozzle, without crushed cables or exposed conductors. UL 499 addresses electric heating appliance construction, while IEC 60204-1 provides widely used machinery electrical-safety guidance. These references do not replace a site risk assessment.
During commissioning, monitor temperature at the nozzle surface, not only the controller display. Allow thermal stabilization before dispensing or printing. Inspect connectors after the first heating cycle. I still check twice. It feels excessive, but loose terminals can create localized heating. One missed dimension can ruin the fit. Installation instructions are often incomplete, so record measured temperatures, fastener condition, and any abnormal smell before regular operation.
Conclusion
Choosing the right Nozzle Heatter is essential for stable extrusion, consistent print quality, and reliable 3D printer performance. Its main function is to heat the nozzle to the temperature required for melting and smoothly depositing filament. Before making a selection, identify your printer’s nozzle size, filament type, operating temperature, mounting space, and electrical requirements. These details will help you determine whether a cartridge, band, or other heater design is most suitable for your setup.
Pay close attention to the heater’s voltage, wattage, physical dimensions, temperature range, and heating speed. The heater should provide sufficient and even heat without exceeding the limits of the nozzle or control system. It is also important to confirm compatibility with the printer’s wiring, temperature sensor, and installation structure. Choose a durable material, follow proper installation procedures, and include suitable insulation and temperature protection where needed. A well-matched heater improves temperature control, reduces interruptions, and supports safer, more dependable printing.